Revive your old CRT monitor or arcade machine display with this comprehensive cleaning tutorial! Join Lawton Barnes in the Metal Shop as he demonstrates how to safely discharge, clean, and restore a CRT monitor using simple tools and techniques—bringing it back to life like new.
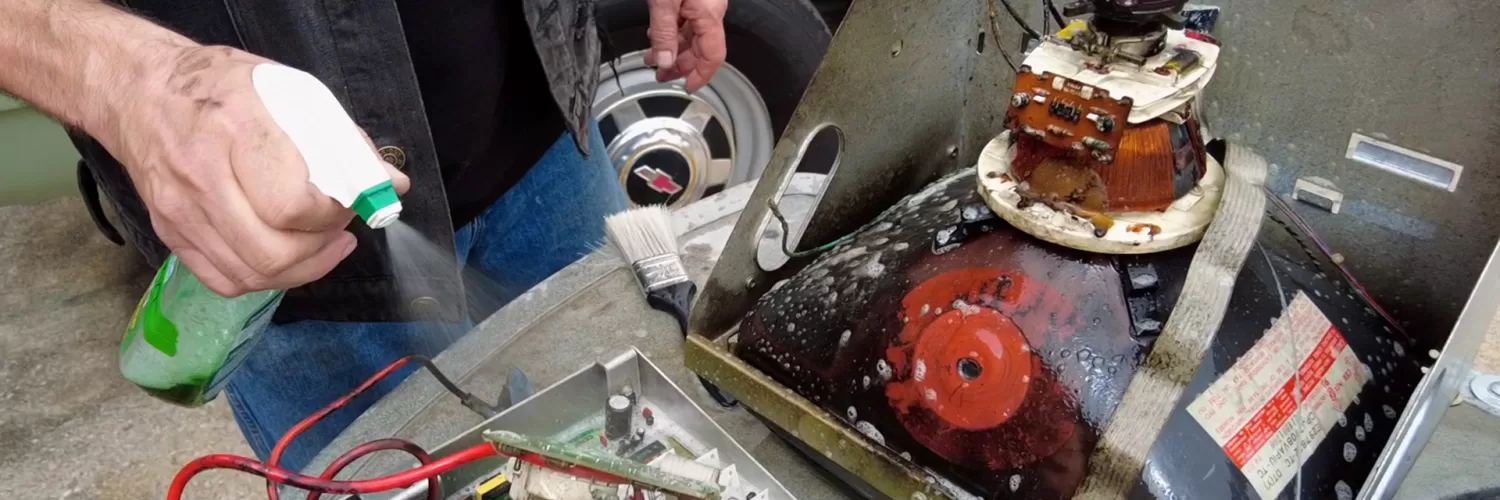
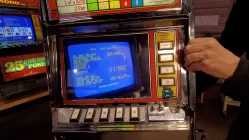
TRANSCRIPT: You’ve just pulled your CRT monitor out of your draw poker machine. Or maybe it’s even your arcade machine. Shout out to all you collectors who have Pac-Mans, Donkey Kongs, Crazy Climbers. The monitor is covered in filth. It’s just got dirt all over it. I’m going to show you how to clean it. I’m Lawton Barnes. You are in the Metal Shop, and let’s go back in time, and get started with pulling a monitor out of a machine and washing it. Roll the tape. EEEEWWWWW! GROSS! Oh my god, that is, that is the dirtiest monitor I have ever seen in my life. I mean, look, these things, they carry a static electric charge. It draws dust particles inside the machine. That is freaking gross. The first thing we always do when working on CRT monitors, is to discharge the tube. All it takes is an alligator clip on the chassis. Another alligator clip onto a flat blade screwdriver, and you’re going to come in here underneath the anode cup, and you’re going to make a connection between that metal connector there, and the ground. And once you’ve done that, then the tube has been discharged, and it’s safe to handle. And I can pull this back and I can press those little clips in on it. On the side of that tab, there… and wiggle that out. And once that’s out, then we just have a few more connections to undo. I’m going to wiggle this out. I’m going to start disconnecting things. Here’s the video input. Here’s our electrical. I’m going to remove this neck board, by jiggling that off, and pulling backward. I’m going to remove this ground wire. And also… the yoke connector, which is right here. What else is still connected? That’s the ribbon cable for the control panel. And now we have removed the chassis. And I’m going to take them outside, and wash them. So let’s go play outside. Okay, so I’m just going to start getting this wet. We’re not trying to blast it. I’m not trying to do anything too crazy. I just want to get it nice and wet. Simple green is the cleanser that I’m using here. This is a little more of a gentle cleanser than some of the others, like 409 or Fantastic. But it does work wonders at dissolving all of this nastiness without being too harsh on your electronics. And then. Put a little of that in there. And then, I’m just using a paintbrush. A nice, soft, clean paintbrush that you haven’t been painting things with. And, Then just very gently… Just get all that dirt off. And over here, too. And the underside of this. That’s not looking too bad. Okay, so I’m not really trying to blast anything here. I’m just giving it a good, thorough rinse. If this were a nice, hot, sunny day, we could just leave this outside and let it dry in the sun. It’s not sunny today. It’s been raining this morning. I’m going to take it back to the shop. I’m going to blow it off with some compressed air, and then we’re just going to put it on a shelf. And, one of the key things here is that, don’t be in a hurry to do this. You want to make sure that it has plenty of time to dry. You don’t want there to be even a single drop of water up under any of those electrical components or anything. It’s fine if you let it sit for three, four days, a week, more. Okay, and final step. Let’s just dry them off a little. I’m going to use some compressed air and just. I think the important thing to note is that it looks almost brand new again. Okay. I’m feeling pretty good about that. Let’s go. Put them in the shop. And so I’m just going to place these on a shelf, and leave them here for several days. I’m going to put that face down, so that any water up in here can flow down. And really the same for the chassis. I’m going to store it upright, so that if there’s any water on it, it’s going to drain down onto this towel and we’ll just leave those sitting there for several days until they’re all dried out. Okay. We are back in the shop. After allowing the chassis and CRT tube to dry on the shelf for several days. This is now sparkling clean, and I’m going to reconnect this back to the monitor, and we’re going to test it out and we’re going to prove that washing the monitor and soap and water at least did no harm. So I’m going to reinstall this chassis onto the CRT monitor. I’ve got an entire video on YouTube showing exactly how to do this, which means this time around, I’m just going to step through it a little quicker than usual. That is our video input. This is going to be the control panel. This is our yoke connector. This is the power input. And then all of this will fit right into there. This is our yoke board with the ground wire that goes here and then plugs on to the end of the CRT tube. And lastly, I will put the anode cup into place from the flyback transformer. Okay. That all seems pretty good. And let’s get a screw to hold it in place. And now I’m going to connect my test pattern generator. Somewhere. Like the bottom of this… Uh-Oh. At the bottom of this monitor. Okay, here’s the moment of truth. Let’s power up the monitor, and we will find out if washing the circuit board in soap and water actually did no harm. Power button. Good sound. Should be warming up. Hey, hey, hey, look at that. Nice, we can step through this. Black and white looks good. Bars look excellent. Look at that. Red, green and blue. Could make some little adjustments there. Maybe on horizontal size. Just a little. All in all, I’m very happy with that. We washed a monitor. It still works. Keep on rocking like Dokken.


Add comment